Pages

Tuesday, November 4, 2014

Whole Wheat Banana Bread with Sunflower Seeds!


Banana bread is always a classic, as a snack, desert, or breakfast!  However, this recipe has been update for the more health conscious.  Also- This recipe makes two to there loafs, as banana bread freezes fantastically well! I hope you enjoy this easy and tasty recipe :)

Ingredients:

3 very ripe bananas

1/3c melted butter

1c of white sugar 

(can easily use 3/4 cup, or drop it down to 1/2 cup if you want it less sweet)

2 egg

1 teaspoon vanilla extract

1 1/2 tsp baking soda

1/2 tsp salt
2 1/2 cups of whole wheat flour
1c unsalted sunflower seeds, shelled

Time:
Make the dough   7min
Bake                  45-60 min
Total                 About an hour

Serves: Varies

Although I did make this recipe in a mixer, that is far from necessary with this recipe. However, if you do not have an electric mixer of some kind, hand held or otherwise, then you would want to pre mash, shift and melt ingredients.

Directions:


1) Preheat the oven to 350°F 

2) In a mixing bowl, add the ingredients, except the baking soda and the sunflower seeds.  You actually don't need to pre melt the butter, or smash the bananas, but you are welcome to.
3) Grease the baking dish.  I prefer more smaller loafs, but it is your personal preference. mash the ripe bananas with a fork until smooth. Stir the melted butter into the mashed bananas.

4) Carefully add the baking soda to the mix, covering as much of the surface as possible with the baking soda. Mix into the dough.

5) Add about 3/4c of the shelled and unsalted sunflower seeds to the mix, and mix in as well.  Keep a 1/8c of sunflower seeds to the side to decorate the loafs. 

6) Fill baking dish 1/2 to 2/4 full of the dough and back for 45 min to an hour. Add the sunflower seeds to the top of the loafs-- Just for fun!

7)  Remove from the oven when the loaf is firm and a slightly darker brown, and let rest on it's side.  This will help with the removing of the bread later.

8) Once cool- remove the loafs.  Serve as is or warmed up!  Wrap whatever is left in aluminum foil before freezing.  I hope you enjoy!


Cost:
bananas              $0.60
flour&sugar         $1.00
butter                  $0.30
eggs                    $0.30
sunflower seeds  $0.70
baking soda        $0.10
vanilla                  $0.10
salt                      $0.01       
Total:                  $3.11
Makes three small loafs :)

Monday, October 27, 2014

Rosemary Skewered Grilled Shrimp and Pasta

I think the title says it all, but if that wasn't enough to sell you how about, "It's Seafood Sale Season!"  Which is where the inspiration for this dish came from, in case you couldn't guess.  I hope you enjoy this recipe as much as I did-- And everyone I served it too!

Ingredients:                                                                                                               12 jumbo shrimp,     1 jar pasta sauce,     1 bag pasta,    4 rosemary springs,    seasonings to taste: I strongly recommend basil, black pepper, and garlic salt

Time: 35 min

Serves: 4, (With left over pasta and sauce...)


Directions: 
1) Shell and rinse the raw shrimp.  For the pretty final effect, leave just the tail on the shrimp, although this isn't necessary.

2) As pictured in series above, once you have shelled and washed your shrimpies, you must devain them.  Please actually do this step!  Turns out the toxins from eating shrimp are almost exclusively in their shit-- Literally.  By devaining the shrimp you get rid of any possible DDT contamination.  ALL shrimp are at risk of DDT contamination, no matter where you buy them or how much you pay.  Shrimp just like to grow in DDT dump sites ;P The "vain" is on the back side, so the opposite of where the legs were.  You will have to cut along the back of the shrimp to find the vain.

3) Skewer the shrimp onto the rosemary springs.  Season as desired-- and pop them in the oiled pan!  If you are grilling, you should oil the shrimp themselves before putting them on the fire. :)

4) Turn the shrimp over after 5-10 minutes.  During this time you should also be boiling your water for the pasta!  You will know when the shrimp are thoroughly cooked because the split you cut into the shrimp to devain them will become very apparent as the meat seems to expand!  Cooked shrimp will look opaque and the outside will have the classic pink look.

5)  Once the pasta is cooked, drain and add the pasta sauce directly to the pot with the pasta in it.  I am a fan of less dishes.  This will heat the pasta sauce quickly too!  Then just plate up, and serve hot!  Bon Appetite!!
Cost:
Shrimp            $6
pasta sauce     $2
pasta               $1
rosemary         hopefully free :)
Total               $9
Per serving    $2.25


Friday, October 24, 2014

Almond Stirr Fry

So the beauty of stir fry is its versatility.  Hence the million and one recipes on the internet... This is the ONLY recipe I know of that includes whole almonds as the major source or protein.  
(Broccoli is also a source of protein as well, and I did add one small chicken tender to make my husband happy :) )

Ingredients:

1/2c   chopped broccoli
1/4c   chopped carrots
1/2c   chopped celery 
3/4c   whole roasted almonds
2 tbs  sesame seeds
1 tbs  Sriracha
1 tsp  garlic powder
4tbs   oil
3-4c  cooked white rice
1/4c  flour (OR "flat" Bisquick! See prior post)

Serves: 3-4 people
Time: 15 min

Directions:

1) Add 2 tbs of the oil, (vegetable oil works best for most Asian food, at least in my opinion), to a large skillet and heat until the oil just starts to crackle. This should take about 2 min.

2) Add your chopped veggies and seasoning to hot pan.  Cover to let the veggies steam a little-- Like 5 min.

3) Add the almonds and keep the skillet uncovered from here forward to keep the almonds from getting too soft.

4) Turn over the ingredients on medium heat for another 5 minutes or so.


5) Make a roux, pronounce "rue," from the flour and about 1/2c of warm water.  You do this by mixing the flour with the warm water vigorously, so that when you add the flour to the dish it doesn't clump. (You could also do this with old Bisquick, as mentioned earlier... although add less rather than more, as you don't want to undercut the Asian flavors.)

6) Add this roux to the veggie mix to thicken the stir fry texture.

7) Once the veggies look just under cooked, (so the carrots can have a fork almost stuck in them with ease), add the rice and the rest of the oil.
8) Work the rice into the dish until each gain of rice looks like it has delicious flavors on it!  You definitely don't want any clumps of rice.

 9) Serve HOT!


Cost:
Veggies         $0.75
Almonds       $1.00
Rice              $0.30
Oil                $0.50
Seasonings    $0.30      
Total             $2.85
Per serving   $0.72


Tuesday, October 21, 2014

Waste not Want not: The Old Bisquick Addition

So this will be another of those post that I will add to with time :)  Feel free to check back.  

Basically, buying in bulk, on sale, or being gifted food is GREAT... Until the food goes bad.  In the case of Bisquick, the Costco size container is great, but hard to go through unless you really love pancakes.  This blog is about alternative uses for "flat" Bisquick.  In other words, the baking soda is no longer rising.

Option 1
Makeshift Flap Jacks
These denser cakes will fall someplace between the British and the american style.  If you really want to confuse people, add rolled oats and honey to the mix-- Literally.

Option 2
Better-Than-Mom's Chicken Soup
Make your mom's-- And then add about 3 tbs of "flat" Bisquick to the broth.  This works best if you first whisk the Bisquick about 3/4 cup of hot water before adding the liquid mix to the actual soup.  Make sure to sure as you add, so you don't get clumps! The Bisquick will give the soup and extra hearty taste! (And look!)

Option 3
Extra American Shepard's Pie
Little known fact: Shepard's pie was coined in America.  Newly coined fact:  If you cut the potato flake crust with "flat" Bisquick, you get a more bakery style crust on this casual dish.  

Option 4
American Style Stirr Fry!
For full details: See Almond Stirr Fry details, but I'm sure you get the picture ;)

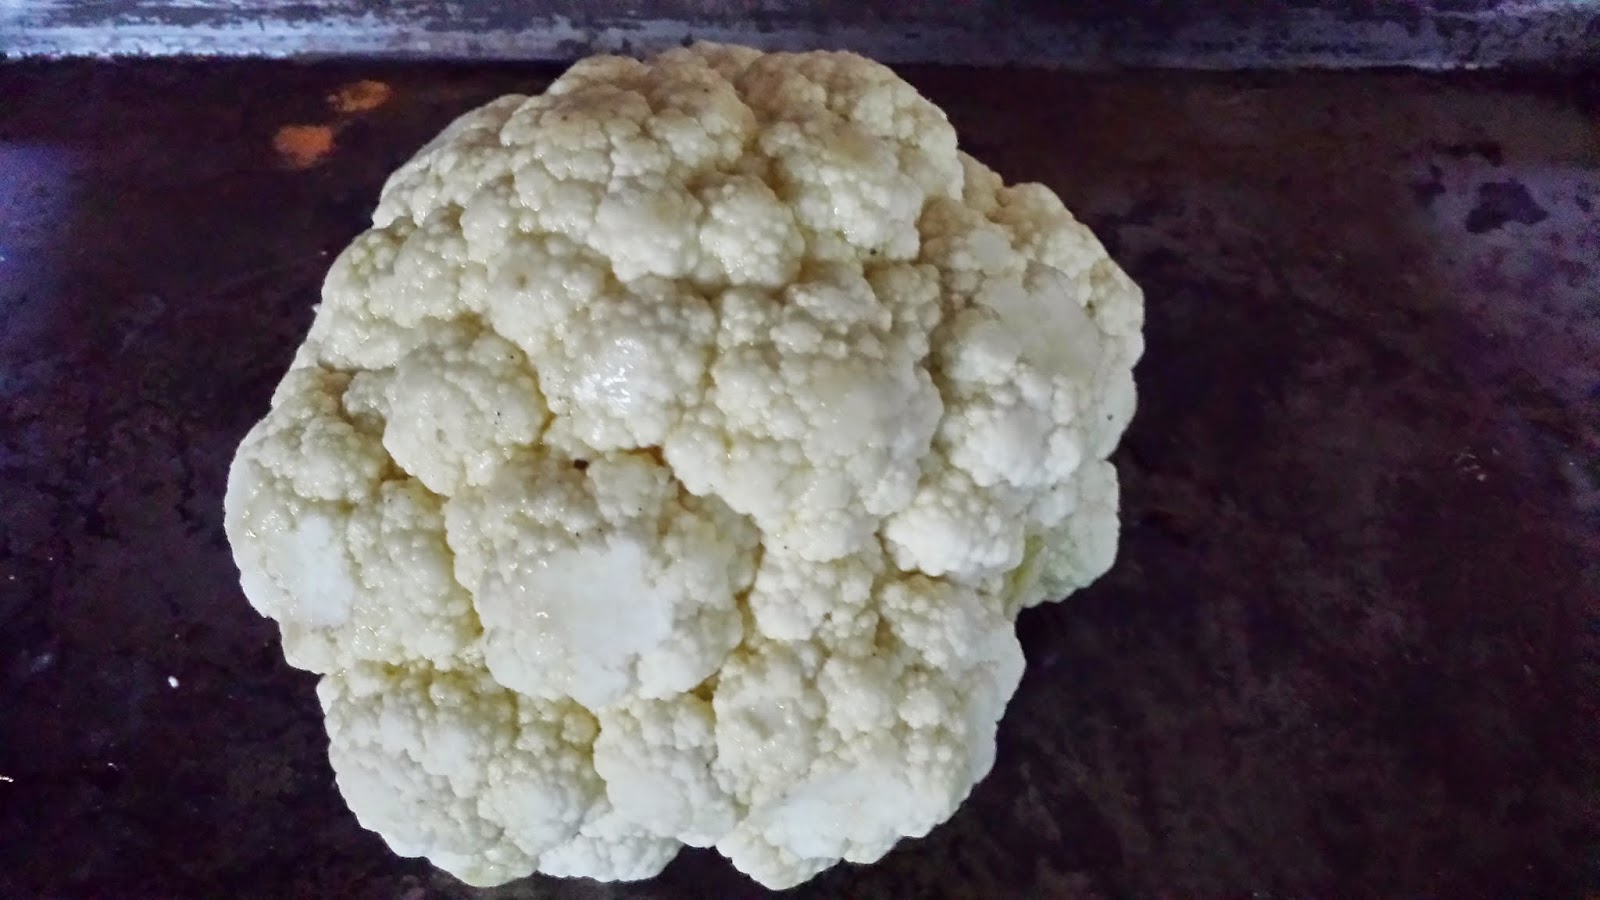
Quick, easy, cheap and beautiful: Roasted Cauliflower!!

Looking for an easy, cheap, and spectacular side dish: Roasted Cauliflower!!! 
No joke, this was the first time I made this, and it turned out fantastic!
Ingredients:
1      head of cauliflower
2tbs olive oil
That's it!!
Time: 45 min total
Serves: 2 as dinner, 6 for a side only

Directions:

1) Wash the head of cauliflower and remove excess steam so that the head will sit up on the baking sheet.

2) Place the head on the backing sheet and lightly coat the top with the olive oil.

3) Place in the oven at 425 degrees!  It's really this easy! Note: do not adjust the temperature for altitude.  

4) Place roasted head on a pretty plate and serve hot!  That's all there is to it!

Cost:
cauliflower     $1
olive oil          $.030           
Total               $1.30
Served as a side: 21 cents!


Shown here served with grilled Tri-Tip and oven roasted potatoes!

Tuesday, September 30, 2014

For the work days: A Hearty, Comfort Food, Bake Dish Potato Casserole II

This one is with meat!  As much as I'm all for being vegetarian friendly, (for both environmental and for cost reasons),  my husband and I do love our meat.  That said, its another week day, so something quick and easy is in order :)

Ingredients:
1             bake potato
1 c          broccoli
1/2          bell pepper
1/16 lb.   Monterey Jack Cheese
2             sausages
seasonings to taste
2 tbs       half&half

Time:
15 min to prep
30 min to bake
45 min total*

Serves: 2 people

*What makes this dish quick is you can do all the prep the morning or even the day before and then just cover it and stick it in the fridge.  Pop it in the oven when you walk in the door, and by the time your ready to eat, dinner is "magically" done!

Directions:

1) Skin the potato.  It doesn't have to be perfect.  If you are going to leave some skin on, then you should make sure the potato is scrubbed extra thoroughly before you start.

2) Chop the potato into slim chunks ( and yes I know that's an oxymoron) and place in the bottom of your 8X6 or 8X8 casserole dish.  If you are making this dish for more than 2 people, then you will need to double all ingredients accordingly and increase the dish size.

3) Add the half&half and turn over the potato pieces to make sure they are all covered.  This is particularly important if you are preparing the dish in advance, as it keeps the potato from browning.  Even if you are preparing this dish in advance, this will make the potato not stick to the bottom of the dish and you still want to add the half&half.  The higher fat content of half&half will make it taste richer, but feel free to substitute.

4) Pre heat the oven to 350. Or do this step at the otherwise appropriate time :)

5) Layer desired veggies and meat.  In this case I fire roasted the bell pepper (and then scrubbed the burned skin off) to give the dish a sweeter taste.  As you've probably noticed, I am a big fan of broccoli.  The sausage does not need to be precooked, and actually works better if you don't!

6) Slice and layer the cheese on the top of the casserole.  Feel free to add seasons of choice.  I chose: Fresh rosemary, dried thyme, black pepper, and a dash of garlic powder.

7) Cover and place in the oven.  Cook for 30 minutes.  Serve hot!

Cost:

bake potato                   $0.50
broccoli                        $0.25
bell pepper                   $0.50
Monterey Jack Cheese $0.80
sausages                       $0.75
half&half                      $0.20
Total                             $3.00
Per person                    $1.50


Monday, September 29, 2014

Channa Masala

With no gluten, MSG, and is GMO free-- Although the whole GMO thing is a bone you don't want me on, as ALL OUR FOOD IS AND HAS BEEN "GMO" since the time civilization arose.

This is going to be a different kind of post because it's kit-based. 

Gourmatra is a good way to introduce yourself to Indain cooking, but is kind of expensive.  The kit here is usually 5.69, although I got it for 2.35.  Kits are great to introduce yourself to something new, but treat them like a crutch you want to be away from as soon as you can :)

Other ingredients:
1 onion
2 small lemons
2 cans of 16 oz Garbonzos beans.
For those who are not familiar with Pulp Fiction, Garbanzos beans are the same thing as Chick Peas...
The box mix
extra rice OR other carb.  I picked tortilla.  Naan will have to be another day.
Traditionally you slice your onions (as pictured on the right) for Indian food, but this is region dependent.  The left is a picture of "chopped" onions.
Pretty much everything but the chick peas goes in the pan along with 3 tbs or more of vegetable oil and you turn the sauce over until "the oil beings to separate." At this point you add the chick peas.  Once the chick peas are warm, you are done!  The directions on the back of the box are somewhat optional but are definitely sufficient!

Time: 30 min to serve
Serves: 3-4 people
Cost: about $3 a person... So not great, but definitely a different experience!

Warning-- The kit says it serves 4 but has enough rice for 1 maybe 2 people...  Definitely be prepared for that! Also, medium heat is pretty hot.  You may want to have milk on hand, or ice cream for desert!