Pages

Showing posts with label cost effective. Show all posts

Tuesday, October 21, 2014

Waste not Want not: The Old Bisquick Addition

So this will be another of those post that I will add to with time :)  Feel free to check back.  

Basically, buying in bulk, on sale, or being gifted food is GREAT... Until the food goes bad.  In the case of Bisquick, the Costco size container is great, but hard to go through unless you really love pancakes.  This blog is about alternative uses for "flat" Bisquick.  In other words, the baking soda is no longer rising.

Option 1
Makeshift Flap Jacks
These denser cakes will fall someplace between the British and the american style.  If you really want to confuse people, add rolled oats and honey to the mix-- Literally.

Option 2
Better-Than-Mom's Chicken Soup
Make your mom's-- And then add about 3 tbs of "flat" Bisquick to the broth.  This works best if you first whisk the Bisquick about 3/4 cup of hot water before adding the liquid mix to the actual soup.  Make sure to sure as you add, so you don't get clumps! The Bisquick will give the soup and extra hearty taste! (And look!)

Option 3
Extra American Shepard's Pie
Little known fact: Shepard's pie was coined in America.  Newly coined fact:  If you cut the potato flake crust with "flat" Bisquick, you get a more bakery style crust on this casual dish.  

Option 4
American Style Stirr Fry!
For full details: See Almond Stirr Fry details, but I'm sure you get the picture ;)

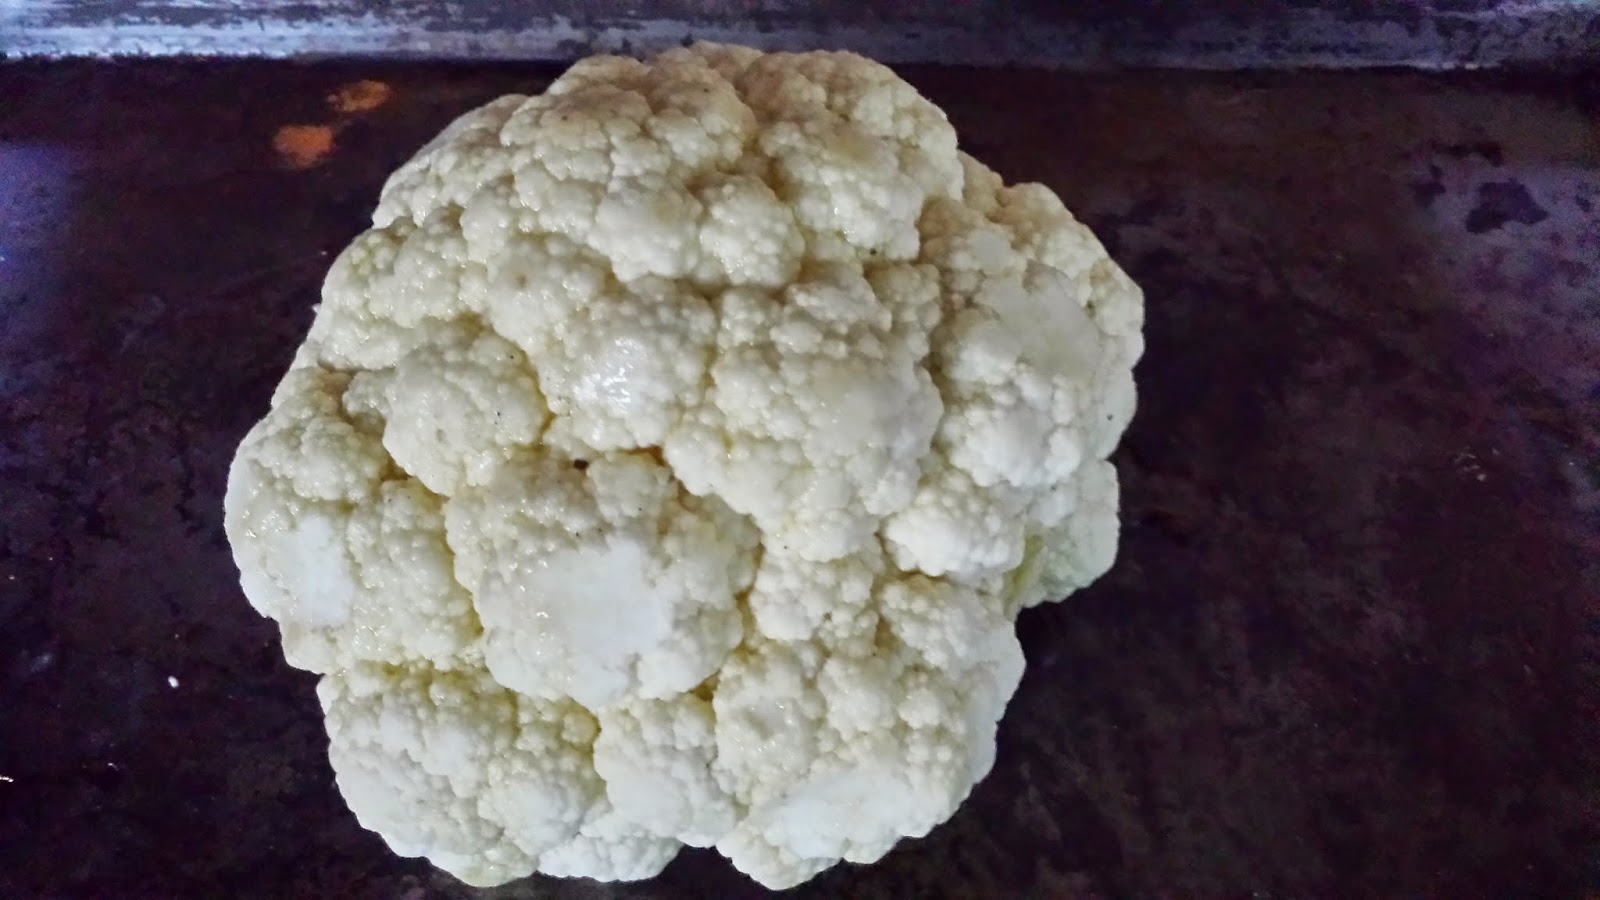
Quick, easy, cheap and beautiful: Roasted Cauliflower!!

Looking for an easy, cheap, and spectacular side dish: Roasted Cauliflower!!! 
No joke, this was the first time I made this, and it turned out fantastic!
Ingredients:
1      head of cauliflower
2tbs olive oil
That's it!!
Time: 45 min total
Serves: 2 as dinner, 6 for a side only

Directions:

1) Wash the head of cauliflower and remove excess steam so that the head will sit up on the baking sheet.

2) Place the head on the backing sheet and lightly coat the top with the olive oil.

3) Place in the oven at 425 degrees!  It's really this easy! Note: do not adjust the temperature for altitude.  

4) Place roasted head on a pretty plate and serve hot!  That's all there is to it!

Cost:
cauliflower     $1
olive oil          $.030           
Total               $1.30
Served as a side: 21 cents!


Shown here served with grilled Tri-Tip and oven roasted potatoes!

Wednesday, September 24, 2014

Marsala Chicken

This is one of those (many) Italian dishes that is so much better to make yourself.  And more affordable too!
Ingredients:
1c         white mushrooms, washed and sliced
1c         Marsala wine
4           chicken breasts, or equivalent tenders in weight
1 tsp     oregano
1tbs      basil
1/2 tsp  salt
4 tbs     olive oil
7oz       pasta
1/4c      all purpose flour

Time: 
10 min prep
20 min cooking
30 min total

Serves: 4 people +

There is a lot of flexibility in this dish. Any pasta works-- So just pick your favorite!  I chose "star" pasta for this dish because it's an easy way to give the dish a "thick, hardy taste," which my husband prefers.  Were I making this for just me, I would use whole wheat spiral pasta, as that is my personal favorite. Along those lines, feel free to add more or less seasonings depending on taste. Pepper is very commonly in this dish.  Most of all-- Have fun!!

Direction:

1) Wash and slice the mushrooms-- Never trust that they are "pre-washed" unless you like the idea of literally eating shit.

2) Start the water boiling for the pasta.

3) In a high lipped plate, mix together the flower, salt, oregano, and basil.

4) Coat the thawed chicken in the flour mixture.

5) Place the chicken into a large skillet with the hot olive oil. (Aka, the stove is already on.)

5) Brown the chicken on both sides. This will take a few minutes for each side.
6) Add the mushrooms and cover the skillet.  This will help the mushrooms 'sweat.' This is only to get them started, so don't exceed 5 minutes.

7) Add the pasta to the now boiling water.

8) Add the sherry and cover again. This time cover for 10 minutes.  Interrupt the 10 minutes to turn the chicken over.

9) Uncover the chicken for the final few minutes to thicken the sauce. Add a sprinkling of flour if necessary.

10) Drain the pasta and mix in well with the Chicken Marsala.  Serve warm!

Cost:
white mushrooms     $1.50
Marsala wine            $2.00
chicken                     $2.00
oregano                    $0.10
basil                         $0.35
salt                            $0.02
olive oil                    $0.50
flour                          $0.20
pasta                         $0.25
Total                         $6.92
Per person                $1.73

Sunday, September 21, 2014

Asian Fusion Pizza!

So it's a Sunday, and I feel like pizza :)  But not just any pizza: Asian Fusion Pizza with sesame and garlic based sauce topped with Muenster cheese, onions, broccoli, sausage and fresh greens!  Served on a Agave pizza crust!
Ingredients:

The Pizza!
1/4      white onion
1c       grated muenster cheese, ( for finally chopped)
4 tbs   Asian Toasted Seasame Seed Dressing
2-4     sausages, pretty much any kind, cooked
1 1/2c spring greens, washed
1c       fresh broccoli

The Dough!
(This should make you think twice about buying ready made pizza crusts!)
2 1/2 c all purpose flour
1 tbs    agave
1 tsp    salt
1 pkg  quick active dry yeast (or Rapid)
3 tbs   olive oil
1 c.    very warm water
(But no boiling!  Boiling will run the risk of killing the yeast)

Serving: 4 people, easily
Time: 1 hour all in

This recipe will definitely demonstrate what a hodgepodge cooker I am.  If it's in the fridge, it's game to be used!  Point and case, the "sauce" for this pizza is salad dressing-- And it will be amazing!!  Just trust me :)

For recipe involving dough, you always need to read the whole recipe first to know if you need to make the dough first or the 'filling,' so to speak.  Timing is much more important if anything has yeast in it.  There are precise chemical reactions going on to make your food yummy!

For this recipe, and all pizza recipes, start with the dough.

Directions:

1) In a large mixing bowl, add the flour, salt, package yeast, and agave.  Do not mix yet.  There are a lot of pizza recipes out there that get very elaborate at this point.  Although this is an important step, getting fancy doesn't make the dough taste better nor does it make your time in the kitchen more enjoyable.

2) Add the warm water evenly over the top. Slowly pour until you can no longer visibly see the yeast.


3) Mix thoroughly for 5 to 7 minutes.  The dough should be between tacky and stringy at this point.  Add more flour or warm water as necessary.  Be careful with the water-- A little goes a LONG way.

4) Ball the dough loosely in the middle of the bowl and cover loosely with cling wrap.   Do not use a damp cloth unless you hate that cloth-- I have definitely wrecked cloths that way.


5) Set aside for 30 min.  If you aren't ready for dinner just yet, set in the fridge for 3 to 4 hours.

6) Prepare the toppings, including grating or chopping the cheese.

7) This is also a good point to start preheating the oven to 400 degrees.  If thick crust, 375, and if thin crust 425 will work best.

8) Once the dough has more than doubled in size, with floured hands and on a floured surface, work the dough into the round disc everyone associates with pizza!

9) Place the dough on a backing sheet, that has flour or cornmeal spread on it, for easy lift off at the end :)

10) Add the dressing 'sauce' to the dough, and spread around smoothly with the back of a spoon up to 1/4 inch from the edge of the dough.

11) Add cheese and toppings as desired.

12) Bake for 20 min OR LESS.

13) Add the fresh greens to the top of the pizza after slicing.

14) Serve warm!

Cost:

All purpose flour                     $0.50
Agave                                     $0.10
Salt                                          $0.02
Quick active dry yeast            $0.50
Olive oil                                  $0.20
White onion                            $0.25
Muenster cheese                     $0.75
Asian Toasted... Dressing      $0.20
Sausages                                 $1.00
Spring greens                         $0.30
Broccoli                                  $0.20
Total                                       $4.02
Per serving                             $1.00


How much pizza this recipe actually makes!!


Thursday, August 14, 2014

Pumpkin Ravioli in Home-Made Cheese-Potato Sauce with Broccoli Florets

 Just in time for fall! This is a quick and colorful meal that also happens to be well balanced :)

Ingredients:
1  package pumpkin ravioli (available at Costco)
1/2 bag frozen broccoli
1 cup hard white cheese of choice ( recommend: Jarlsberg) grated
3 red potatoes
2 tbs oil ( or bacon grease if so inclined)
1/4 cup milk (reduced milk works better than non-fat milk)

Estimated time: 30 min
Serves 4

So I'm going to make an effort to talk more about the food as there is clearly more to it than throwing some stuff you bought in a pot.  This meal is actually one of my favorite quick-and-easy dishes because 1) It's quick and easy, 2) It's reasonably healthy, 3) It's vegetarian friendly, 4) It stores super well!, and 5) It's easy to adjust to whatever you currently have in your fridge.

Also, my husband has recently quite smoking (YAY!) and broccoli is not only a great source of protein, calcium, and fiber-- Broccoli is also partially good at cleansing you of toxins, specifically including those from cigarette.

Directions:

1) Cook the potatoes.  I prefer boiling them in a pot of water, but that takes longer than microwaving them so it's up to your time schedule.  You will know when the potatoes are done because you will be able to easily stick a fork into them. At that point, let the potatoes cool to the point you can slice them up comfortably.

2) Boil water for the pasta.  Add at pinch of salt (to increase the temperature at which the water boils) and a dash of oil, any kind of oil but I use olive oil, (to help the pasta not stick to itself while it's cooking).

3) Place cooked and sliced potatoes into a bowl and pour the milk over the potatoes. This will keep the potatoes from browning AND will give the potatoes a creamy taste that is oh-so-good!  Let soak at least 7 minutes.

4) To a sauce pan, add the bacon grease to liberally coat the bottom of the pan.Then add the grated cheese. The harder the cheese the more time you will need to give the cheese alone to get "sweated."  Basically, you are just softening up the cheese, which you will know you have done by the limping texture of the cheese, or on thicker pieces, but the droplets of oil that are escaping from the cheese.

5) Add the butter soaked potatoes slices and broccoli to the sauce pan and stir well.  Keep an eye on your sauce pan and stir as needed, which will be often.

Note: If you are using fresh broccoli you may want to pre-steam if for 5-10 minutes.  You can do this in a third pan with some water and and a lid, already brought to boil before the broccoli is added OR in a bowl in the microwave with a WET paper towel placed on top.  Just remember, broccoli is one of those foods that looses it's victims when cooked throughly.

6) Add the pasta to the boiling water.  Let cook 10 min. With the Costco brand, I find the ravioli falls apart if you cook it longer than this...

7) Drain the pasta. Add your broccoli and cheesy potatoes to the pasta.  Mix well. Serve hot!

Definitely feel free to season to taste!  I usually ad basil (because it's my husband favorite), pepper, and cayenne pepper (because tis' mild for a pepper but makes everything look so tasty!).  An easy way to increase the serving size is to add more potatoes and broccoli.

Cost:


Package pumpkin ravioli   $4 (for one of the two jointed packages from Costco)
1/2 bag frozen broccoli      $1.50
hard white cheese              $1
3 red potatoes                    $0.50
oil                                      $0.10
milk                                   $0.15                                              
Total                                 $7.25
Per Serving                      $1.81


Sunday, August 10, 2014

Ginger, Caramelized Onion (and Chicken) Quesadilla with Pineapple Salsa!

The definition of inexpensive gourmet food!

Ingredients:
6      Tortillas      
1      White onion  (large)
6 tbs Chopped ginger
2 tbs Rice vinegar
1 tbs Aged balsamic vinegar
1 tsp Steak seasoning
3 cups Jarlsberg grated cheese
1/2 jar Pineapple salsa
1 tbs Olive oil
(3 chicken breasts)

Total time: 20 min
Serves: 6 


Mixture of sweated onions, ginger,
balsamic vinegar and CHEESE!
Directions:
1) Chop whole white ion ion and ginger finally together.

2) Sweat onions and ginger in rice vinegar and olive oil. (Or Butter for the less health conscious.)

3) Season to taste with recommend 1/2 steak seasoning, and sweat 5 more minutes.

4) Drizzle aged balsamic vinegar over the sweated onions and ginger, and let cool. ( This is to soak up the delicious balsamic vinegar!)

5) Added cooled onions and ginger to large mixing bowl with grated cheese, ( and chicken cooked with 1/2 tbs steak seasoning, if desired.)

6) Add final mixture to tortillas. ( In the pictures the are done in halves only to maintain versatility for each person. This also makes it easier to flip.)

7) Brown quesadilla in heat pan with olive oil and serve warm!  Top with salsa of choice-- Pineapple Salsa pictured below is recommend ;)
The reason I will NEVER recommend microwaving
anything is pictured to the right--->
THIS is a properly brown quesadilla! 


If pineapple salsa is not available in your area, pick a mild salsa and and extra chopped canned pineapple chunks to it-- it's pretty much the same thing :)
Cost:

Tortillas                           $2
White onion  (large)        $1
Chopped ginger              $1
Rice vinegar                   $0.30
Aged balsamic vinegar   $0.25
Steak seasoning              $0.10
Jarlsberg grated cheese   $2
Pineapple salsa               $1
Olive oil                         $0.10
(3 chicken breasts)         $2            
Total                              $9.75
Per serving: $1.62, WITH chicken :)

Alternative "Gateway Sushi"!!!

To convert even the most resistant meat eaters to the way of bait!!
Warning: This post is for the adventurous!! 

 So making sushi itself is a lot easier than any recipe I've seen has made it look. This is assuming you are not interested in single handedly perfecting the true art of sushi.

1)Make a pot or rice, (doesn't really matter what kind).
2) Cut up veggies of choice into long slivers. Carrots, cucumber, even lemon peels work great!
3) Mix the rice with some salt, sugar, and rice vinegar so that is is malleable.  If you add to much-- just smush it in your hand to drain off extra liquid.  It really is that simple!
4) Keep a small bowl of rice vinegar and sugar to the side to "rinse" your ands with in-between rolls.
5) Lay out a small strip of rice onto sushi sea weed sheets. Lay on top of the desired ingredients.  Salmon (Sake) or meatloaf-- I'm a believer in happy customers of all kinds!
6) Roll up the rolls nice and tight.  Notice I have not given any proportions-- it really REALLY doesn't matter as long as you like it.
7) "Seal" your roll with just a touch of the vinegar mixture you have to the side.  Think of it like an envelope.
8) With a very sharp knife, cut the roll in to sushi size pieces.  Make presentable to serve!
 Green tea or Sake (the booze) will bring the experience together no matter what you've made.
 For homemade pickled ginger-- plan ahead-- that does take a good 24 hours to make right, and 4 hours at the minimum. Basically chop the ginger as thinly as possible and then soak it in a bowled (and now cooling) mixture of rice vinegar, a lot of sugar, a pinch of salt, and water.  Chill overnight in the fridge if you can.
This is the happiest first time sushi eater I have ever seen-- Otherwise known as my father.  After years of trying futilely to convince him to eat sushi-- Brown rice, low salt, and meatloaf sushi is the success story!

Hence I really truly believe in doing whatever works for you :)
I also really truly believe in buying the Wasabi...

Rice about         $1
Sushi sheets      $1-7 (depending on where you live)
filling                $1-20 (depending on your tastes)
Rice vinegar     $1.50-7.00 (depending on where you live)
sugar and salt    $1 or less                                                      
                         $5 to $$$... it's all up to you....

Thursday, May 22, 2014

The Avocado Snack that Makes a Easy Meal~

Fast+Healthy= Will actually happen
Ingredients:
2 slices of toast
1/2 avocado
Lawyer's Seasoning Salt

Directions:
Prep as shown in the picture and toast in toaster, lightly.  The end.

Time: 5 min

Serves: 1 

Cost: Basically the cost of the avocado so if you time it right this is a $1 meal

AND DELICIOUS!!!!

Did I mention delicious? ;)

Monday, May 19, 2014

Adventures in Quinoa: Pasta Substitute Time!

As promised: Californian Summer Pasta with Chicken
(Except with Quinoa ;) )

Ingredients:
2 chicken breasts 
1 avocado
1 lemon
3 oranges
1/4 cup orange liquor
fresh rosemary, thyme, black pepper, etc
2 cup quinoa
1 large tomato (Or several small ones as pictured here.)

Directions:

Heat the 2 oranges of juice and two oranges of zest in large frying pan.  Add chopped seasons and pepper, one lemon of juice, and the orange liquor to the pan. Heat sauce on low and then add thawed chicken breast, (2 and cut in half to serve 4 people or you can add 4 whole beasts), to the pan. Cover until the chicken is cooked.  In the mean time, add 2 cups of Quinoa to 4 cups of boiling water.  Add more water as needed. Plate and place chicken breast on top.  Add the fresh avocado-- and any food art desired--Serve hot!  The third orange is for garnish, as you may have noticed--


Serves 4!

Cost:
chicken           $1.99
oranges           $1.00
lemon              $0.50
avocado          $1.00
Quinoa           $1.00
spices/etc.       $0.25     
Total cost:      $5.75

So less than $1.50 a person for this meal.. and it's looks and tastes gourmet!

Time to prepare is thirty minutes, and it makes a great Mother's Day meal ;)

Adventures in Quinoa: Mushroom Caps!!

~~The vegetarian addition~~


Ingredients:
3 cups chopped mushrooms
1 cup chopped celery
1 cup chopped onion
1 cup chopped bell peppers
1/4 cup sweet chili sauce
1/4 vegetable oil
1 cup quinoa
Seasonings to taste... For those truly on the "student budget" I recommend half a package of Raman flavoring ;)

Directions:
Add celery, bell peppers and the carrots to a pan with the hot vegetable oil.  Let these veggies cook most of the way with the lid on to steam them.  Once these veggies are mostly done, add the sliced mushrooms and leave the lid off, (as mushrooms release a lot of water). Meanwhile, boil 2 cups of water.  to the boiling water add the 1 cup a quinoa.  As more water if needed.  Combine all cooked ingredients, plus the sweet chili sauce and seasonings, together.  Back mushroom caps for 30 min at 350 degrees. Garnish with parsley or Sriracha if available.  Serve hot!
You already know this is going to be a healthy dish!

Cook the veggies most of the way before stirring in the fully cooked Quinoa.

Assemble on a backing sheet--This can be done ahead of time if getting ready for a party!!

Serves an easy 6 as a full meal, or it makes great party appetizers :D

Cost:
mushrooms     $5.99
celery              $1.00
onion              $0.50
bell peppers    $1.50
Quinoa           $0.50
oil/etc.             $0.25     
Total cost:      $9.75

So about $1.60 a person for this meal.. and it's actually really filling AND healthy!

Time to prepare is a good hour, but as mentioned above, assembly can be done ahead of time :)

Tuesday, April 1, 2014

Pinterst: Inspiring (cheap) ways to keep life exciting!

$5 Party Winner:

So it's pot luck time but pre-pay check time...  I saw an image on Pinterst for what I have started calling "Muffin-Tacos."  And that is exactly what they are: Filling finger food with endless possibilities.  They are easy to make, easy to transport, easy to serve, and cheap.  This is otherwise known as PERFECT.  From several sample points I can also say with high confidence they are very popular.

Directions:
As evident by the backing sheet, the recipe makes 12.  This fills a large plate nicely, considering presentation matters.  Oven is set to 350 degrees and the whole process takes about 20 minutes!

1) Soak beans of choice over night (about 3/4 cup).  Or purchase a can of beans--Depending on how health conscious you are
2) Start by cutting a large tortillas into four smaller circles  (The top of a large yoga container works well as a 'cookie-cutter.' See the blog on Inventive Cooking Techniques for more details.)
3) Tuck the cut tortillas into the muffin tin to create a pocket
4) Spoon large dollop of beans into the bottom of the pocket
5) Add a couple slices of avocado (At this point it should look similar to the picture on the right.)
6) Immediate spoon large dollop of salsa on the avocado (If for some reason you are delayed/life happens-- make sure to squeeze some lemon on the avocado so it doesn't brown.)
7) Add cheese layer--- And back until the cheese is melted!

Sever hot, and toast to re-heat.  That's all there is to it!


As it turns out:
$0.75 one avocado
$0.50 less than half a bag of Pinto beans, etc.
$0.50 slices of hard cheese (preferably white)
$1.50 half a jar of spicy salsa (red or green)
$1.00 three large tortillas (soft)                                                        
$4.25 TOTAL 

~And let the party begin~

Thursday, February 27, 2014

Costco Cooking: The Sour Cream

Buying in bulk saves you money... But only if it doesn't spoil before you eat it...


So how to keep life interested, and buy at discount while only feeding two people at a time?  Point and case, the sour cream container from Costco is THREE pounds.  Additionally, keeping life interesting means not having tacos every night.  As we are currently in the Olympics--I thought a sampling of cuisine was in order. And once the container is open, the clock is ticking, so:

1) White Beef Stroganoff  (Russian)

2) Fajitas!  (Mexican-ish... apparently it's more Tex-Mex)

3) Pumpkin Bolani (Afghan)
Image complements of Google

4) Panini with dipping sauce (Italian, mostly)

5) Red Beef Stroganoff!


...And with that, the THREE pounds of sour cream were actually gone... Incase you prefer a different variety of cultures, below are the remainder of the list as was planned:

6) Meatballs in Sour Cream Sauce (Swedish)

7) Corn Chowder (US, and because I love corn chowder)